Web Embed
Version requirement: Pro or higher
Website integration allows you to quickly add LinkAI Agents to your web pages with zero/low-code solutions. Choose from floating chat windows, iframe embedding, or standalone page links for maximum flexibility.
I. Create an Integration
In the LinkAI console, go to Integrations, select Website Integration, and click create. Follow the steps in the popup to complete step 1:
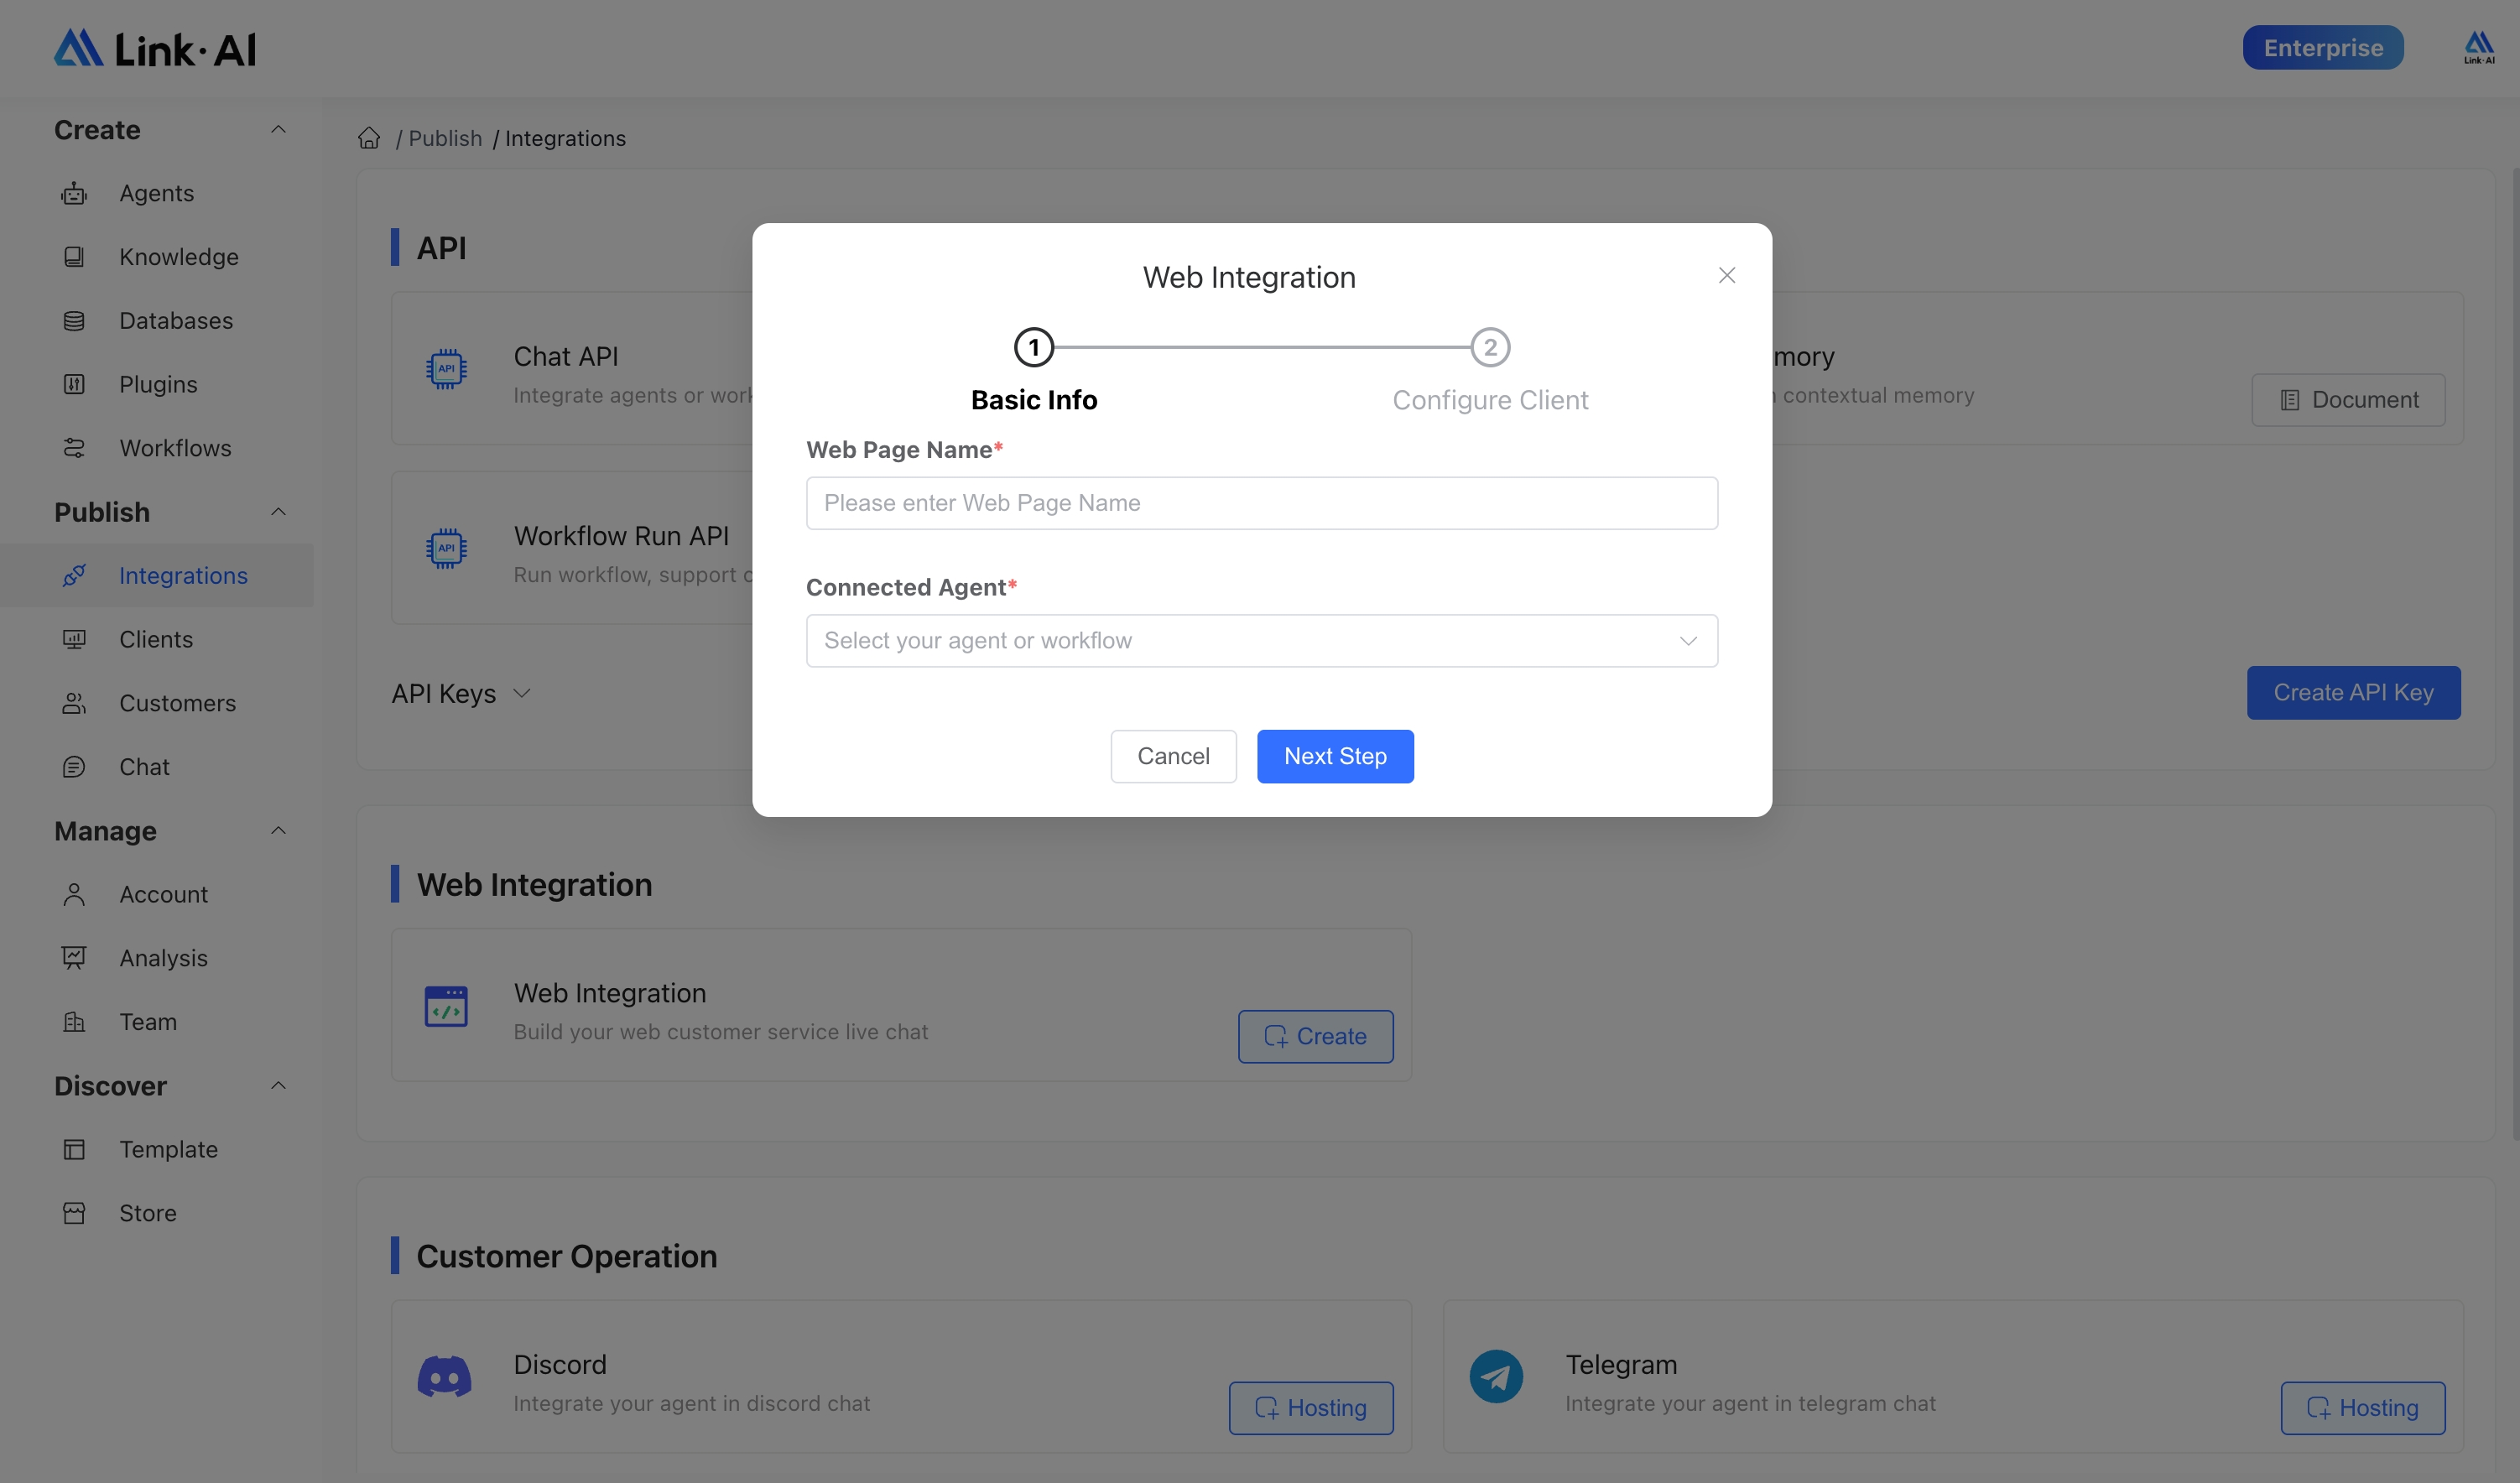
You can choose to integrate either an Agent or a Workflow (note that Agents support streaming output, while Workflows do not). After creation, click confirm to proceed to the client configuration page.
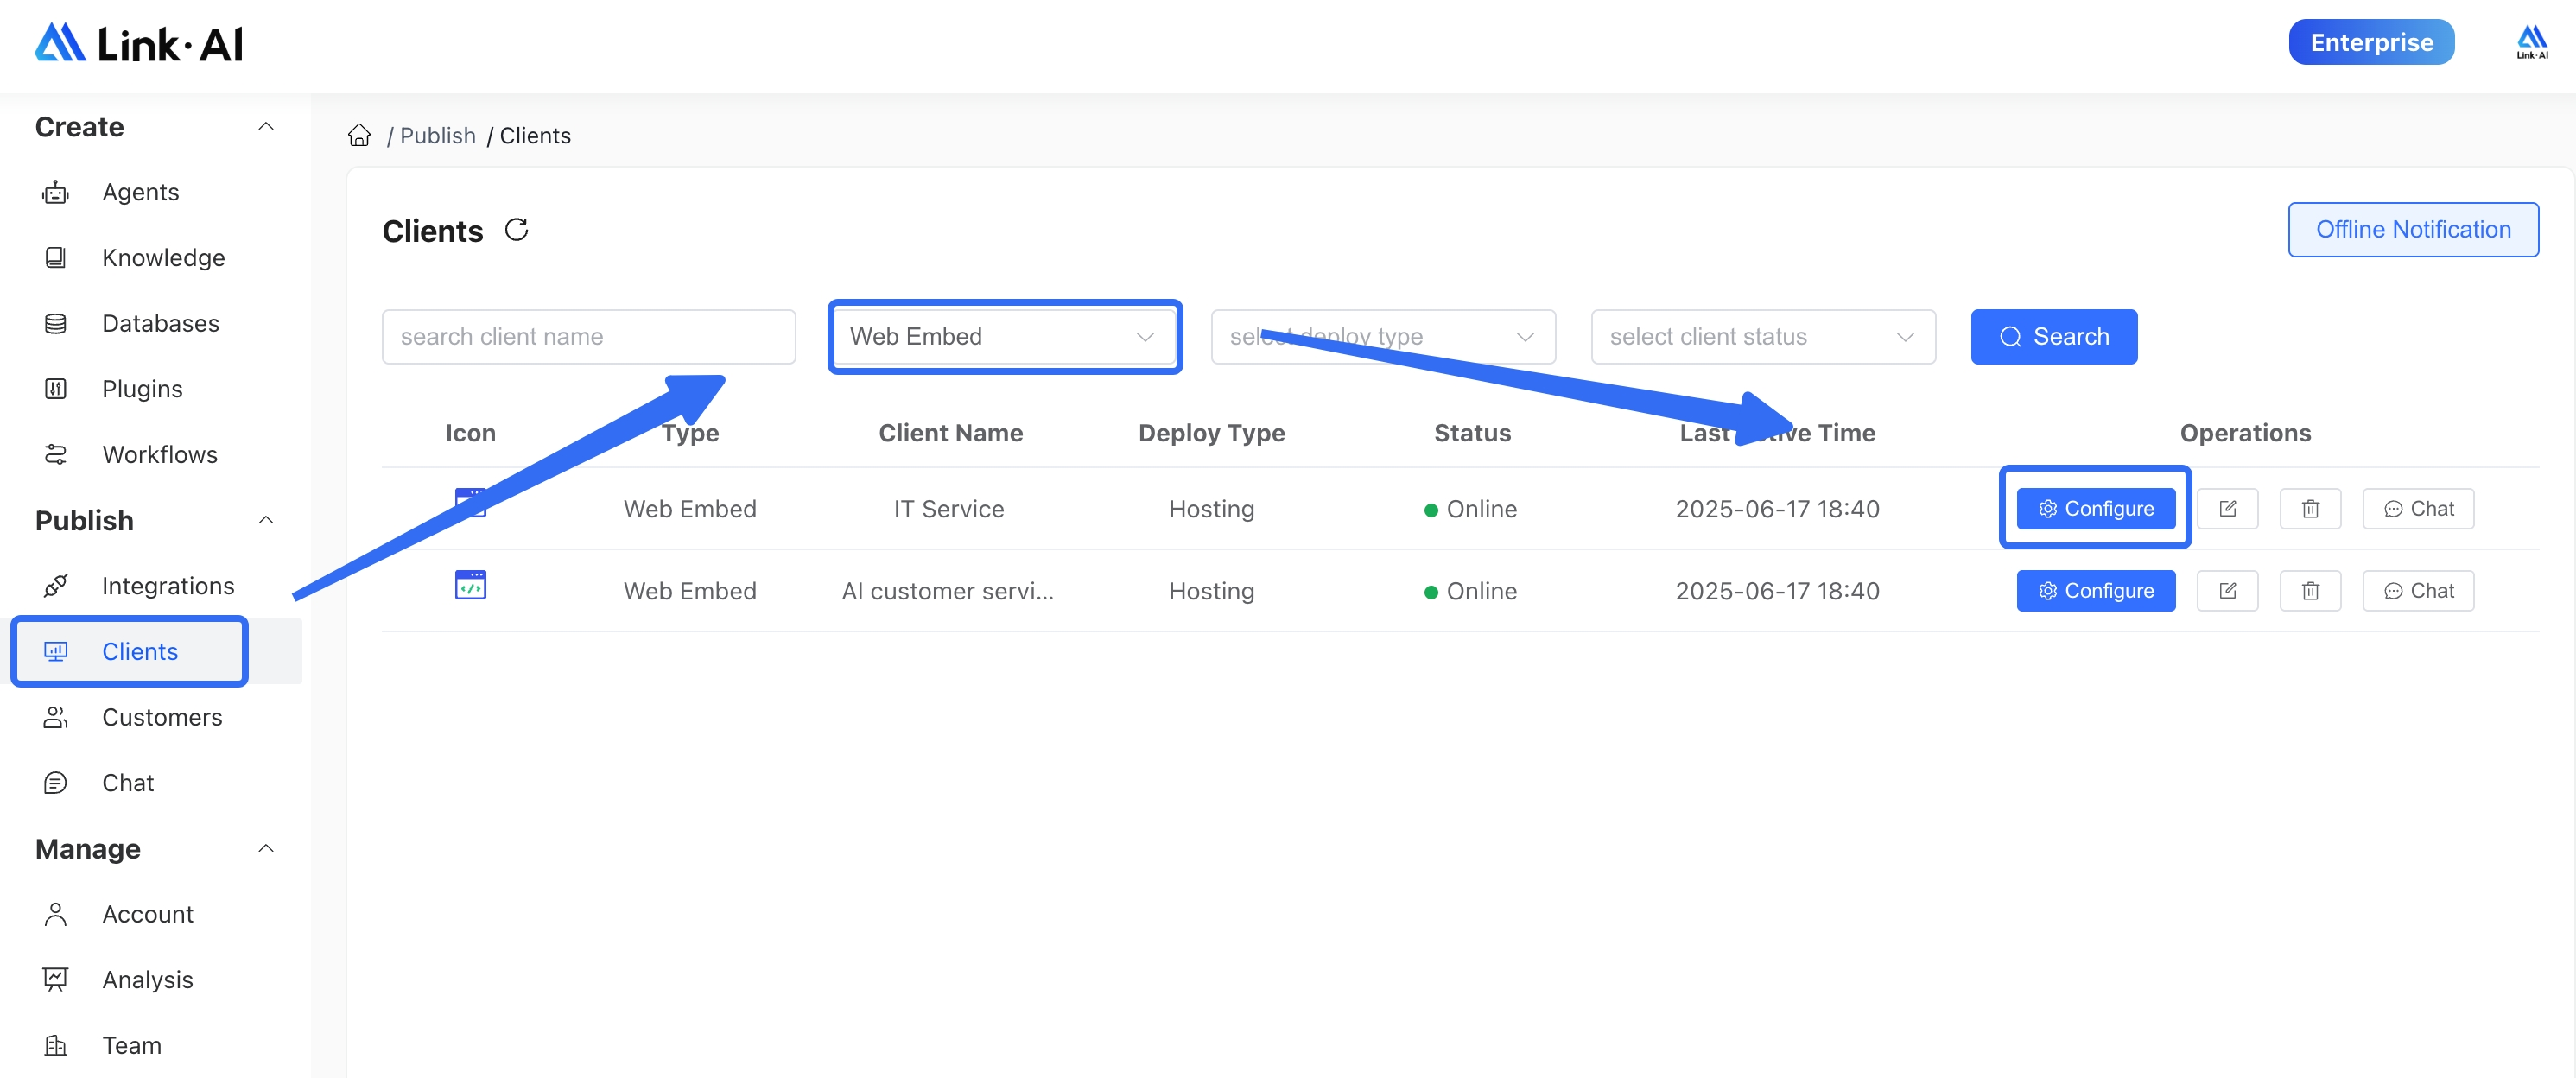
II. Client Configuration
Website integrations can be configured in the Clients menu:
1. Basic Settings
Configure the basic information and styling for your chat window:
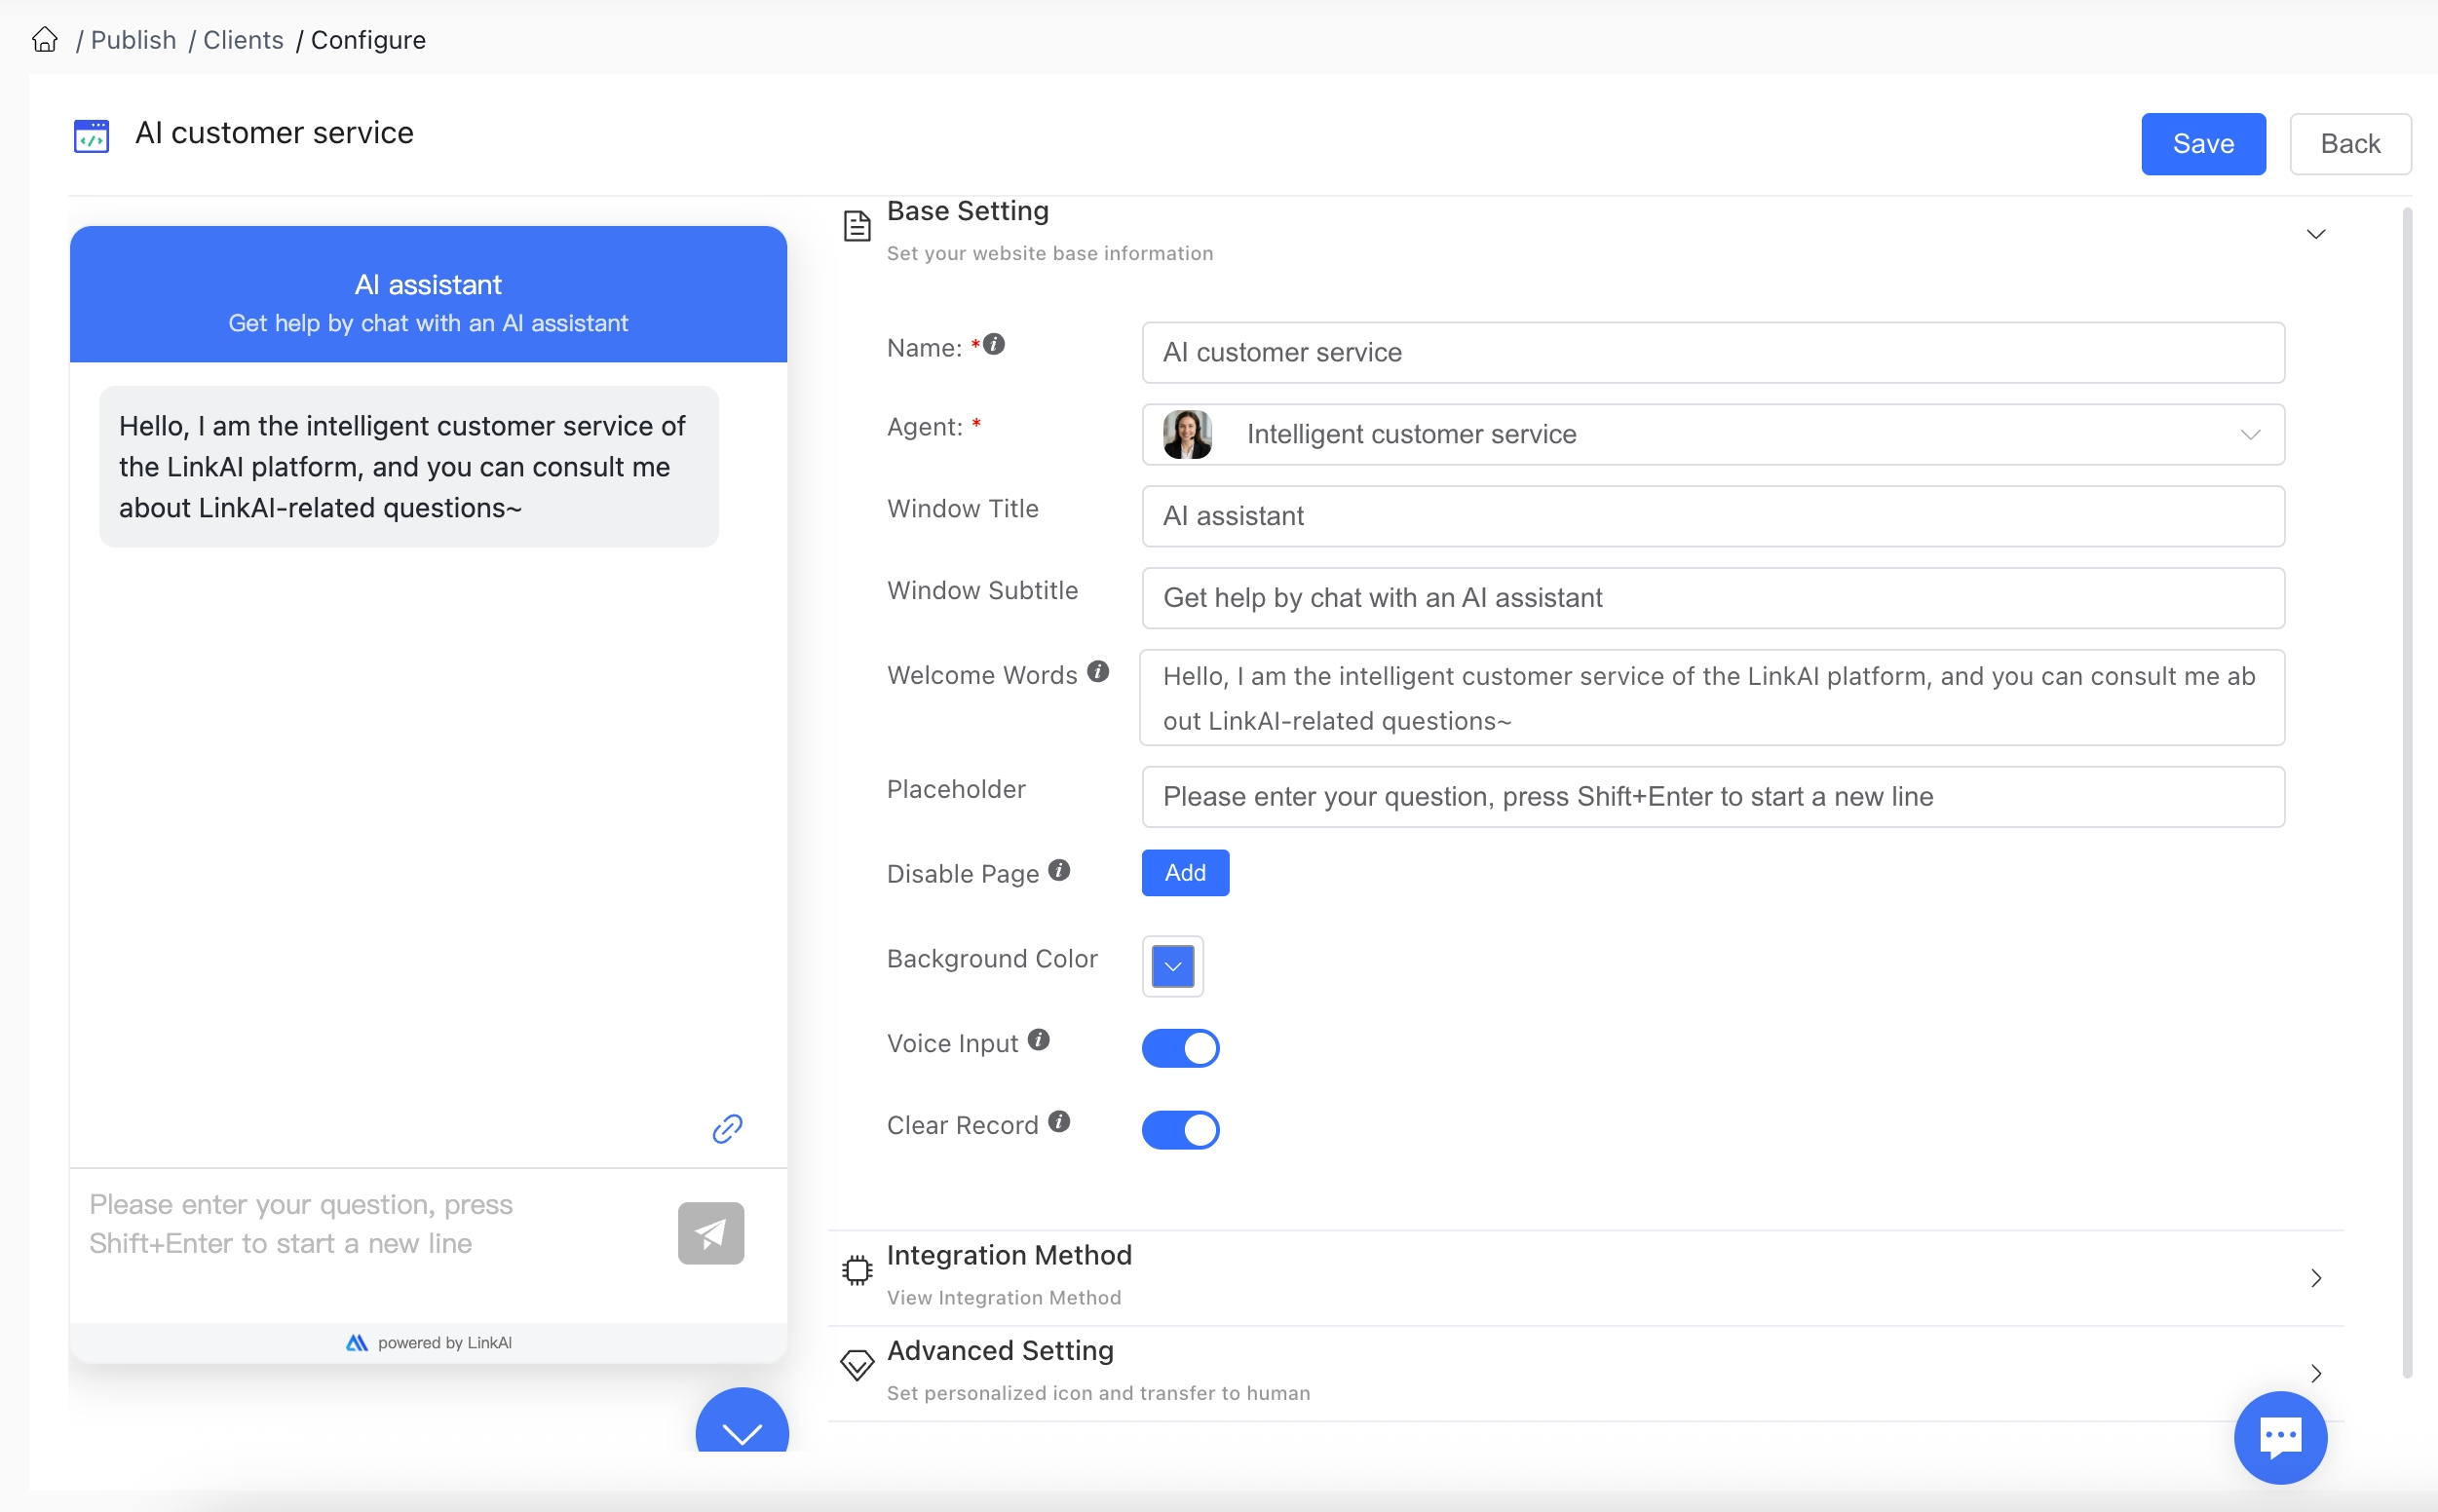
Configuration Options:
Website Name: The browser tab name when using the standalone page link mode
Linked Agent: The AI Agent or Workflow that powers the chat. Changes are applied immediately after saving (note: Workflows currently don't support streaming output)
Title & Subtitle: The header text displayed at the top of the chat window
Welcome Message: The initial message shown when users open the chat window. You can include an introduction to your Agent, usage instructions, and suggested questions
Input Placeholder: The prompt text shown in the user input field
Disabled Pages: If you don't want the floating window to appear on certain pages of your site, add their routes to this list
Background Color: The background color of the chat window's header bar (HEX color code)
Voice Input: When enabled, users can send voice messages that the AI will transcribe and respond to. Note: The embedded website must use HTTPS protocol and the user's browser must have microphone access permission

Clear History: When enabled, users can manually clear their conversation history and context memory
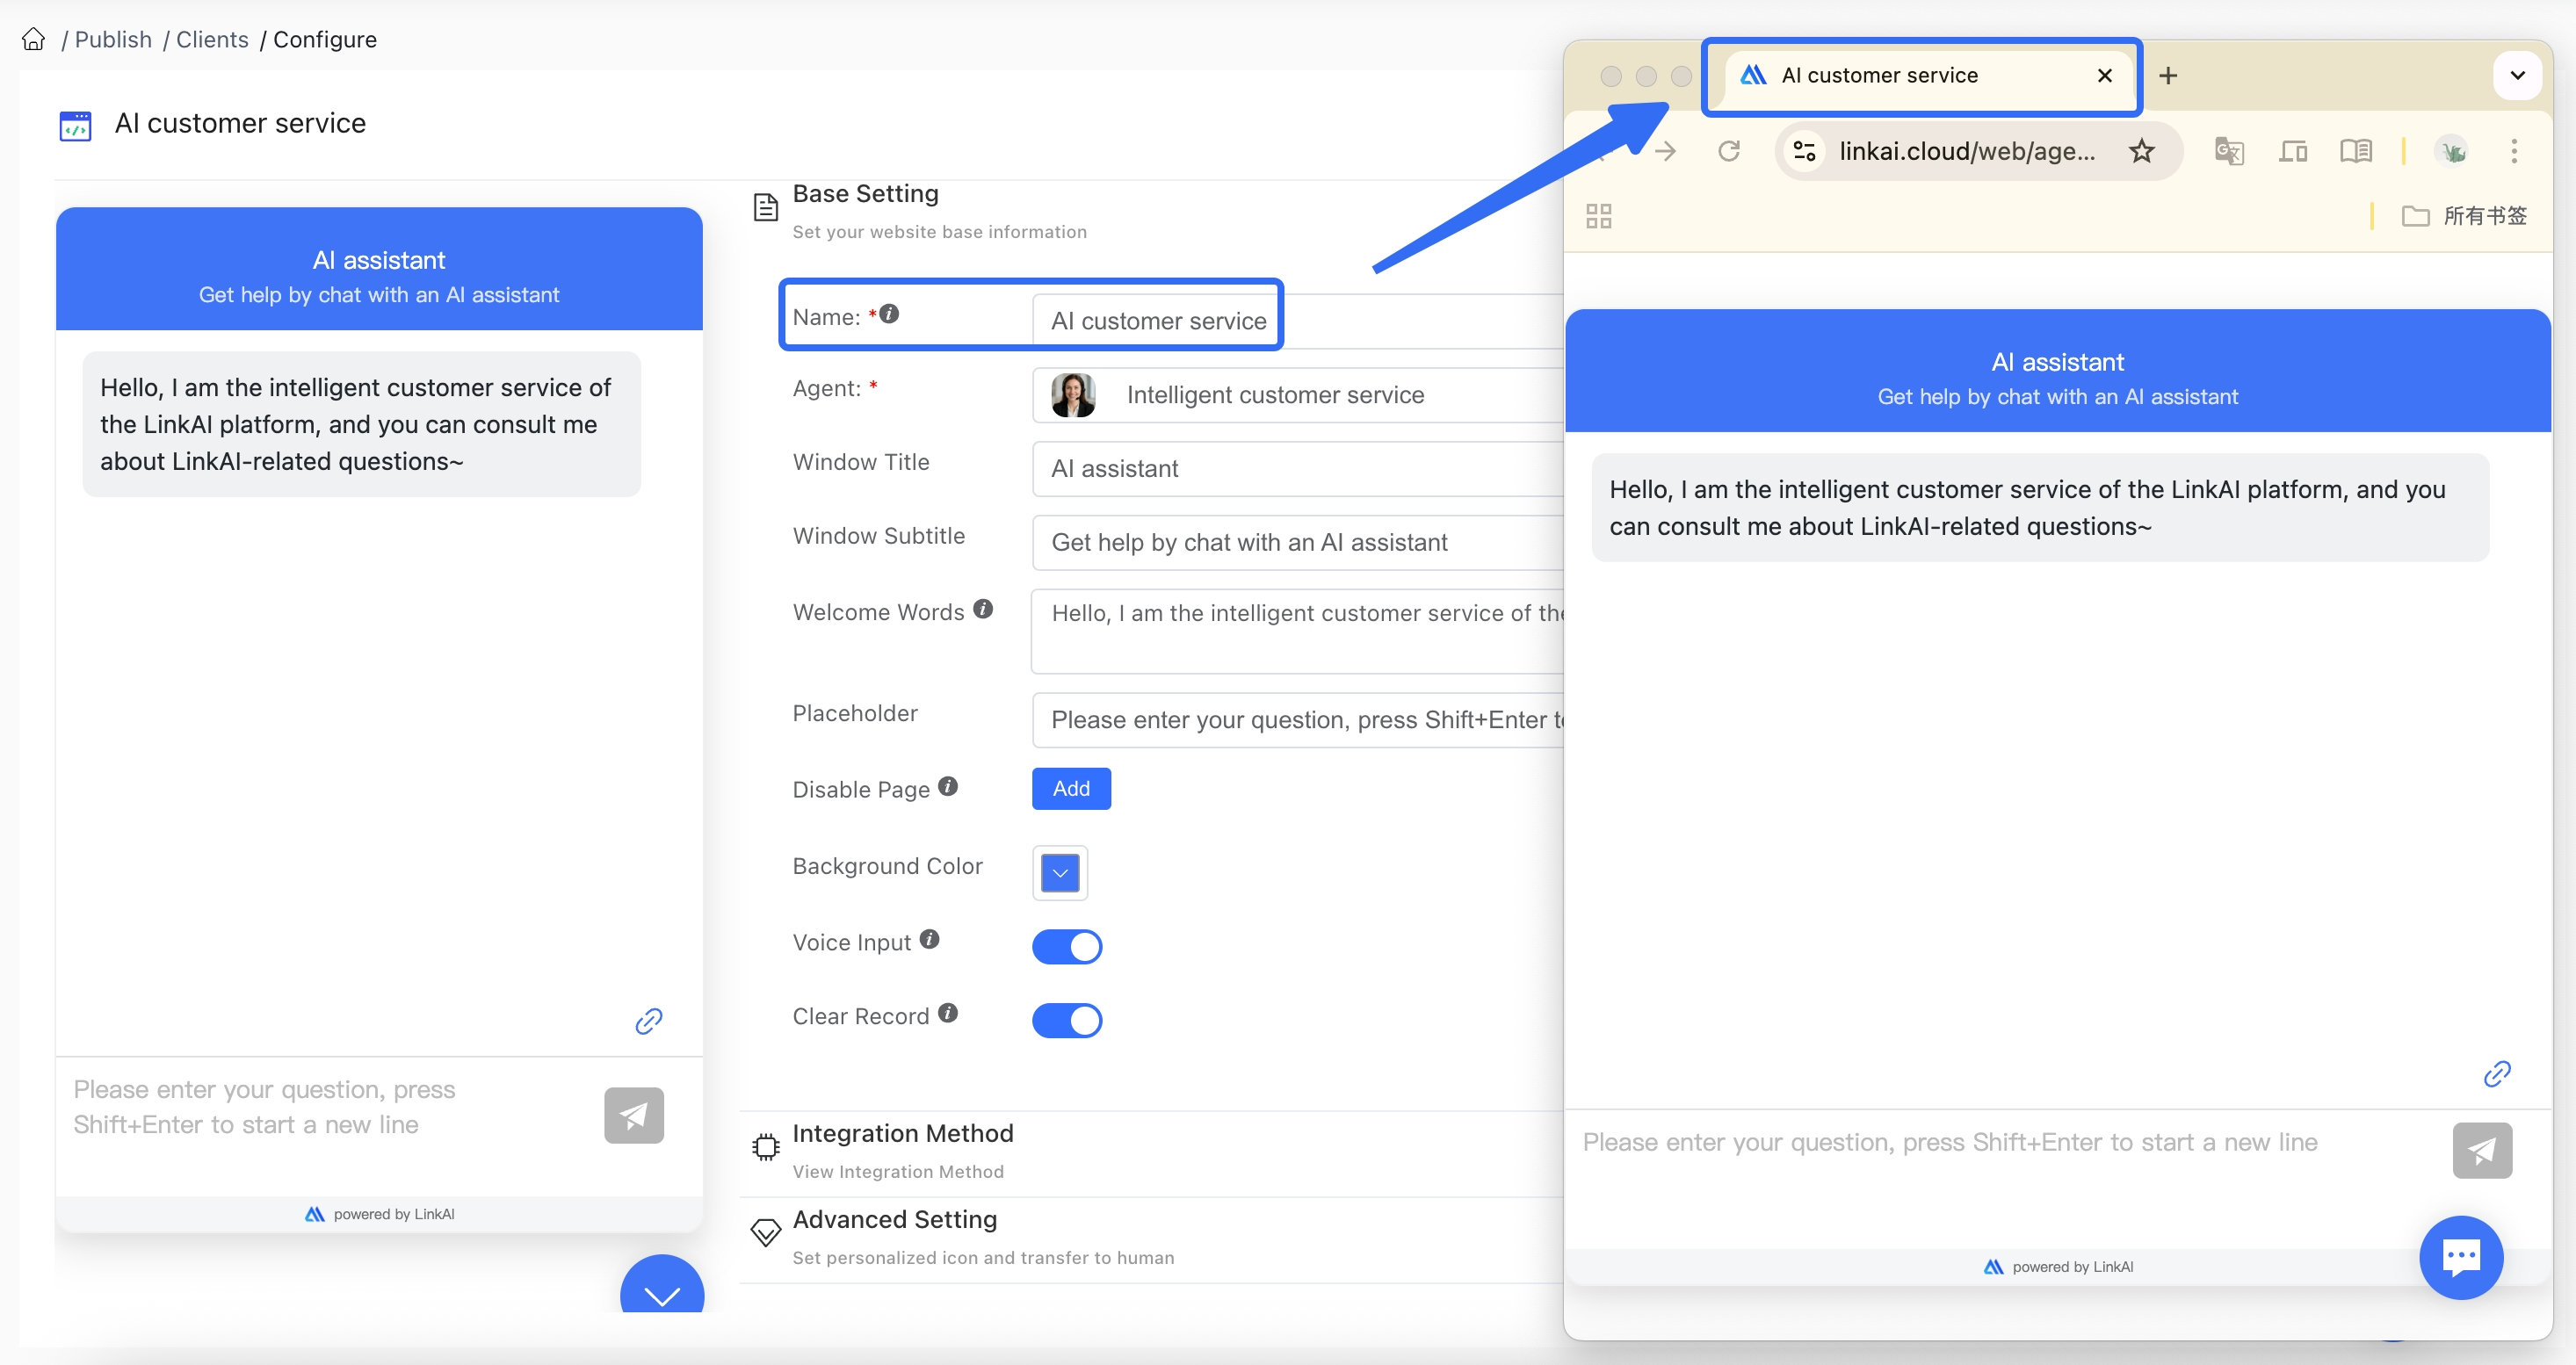
After completing your settings, save to preview the changes on the left (note: changes take effect immediately for end users).
2. Integration Methods
LinkAI offers three ways to integrate Agents into your website: Floating Chat Window, iframe Embedding, and Standalone Page Link:
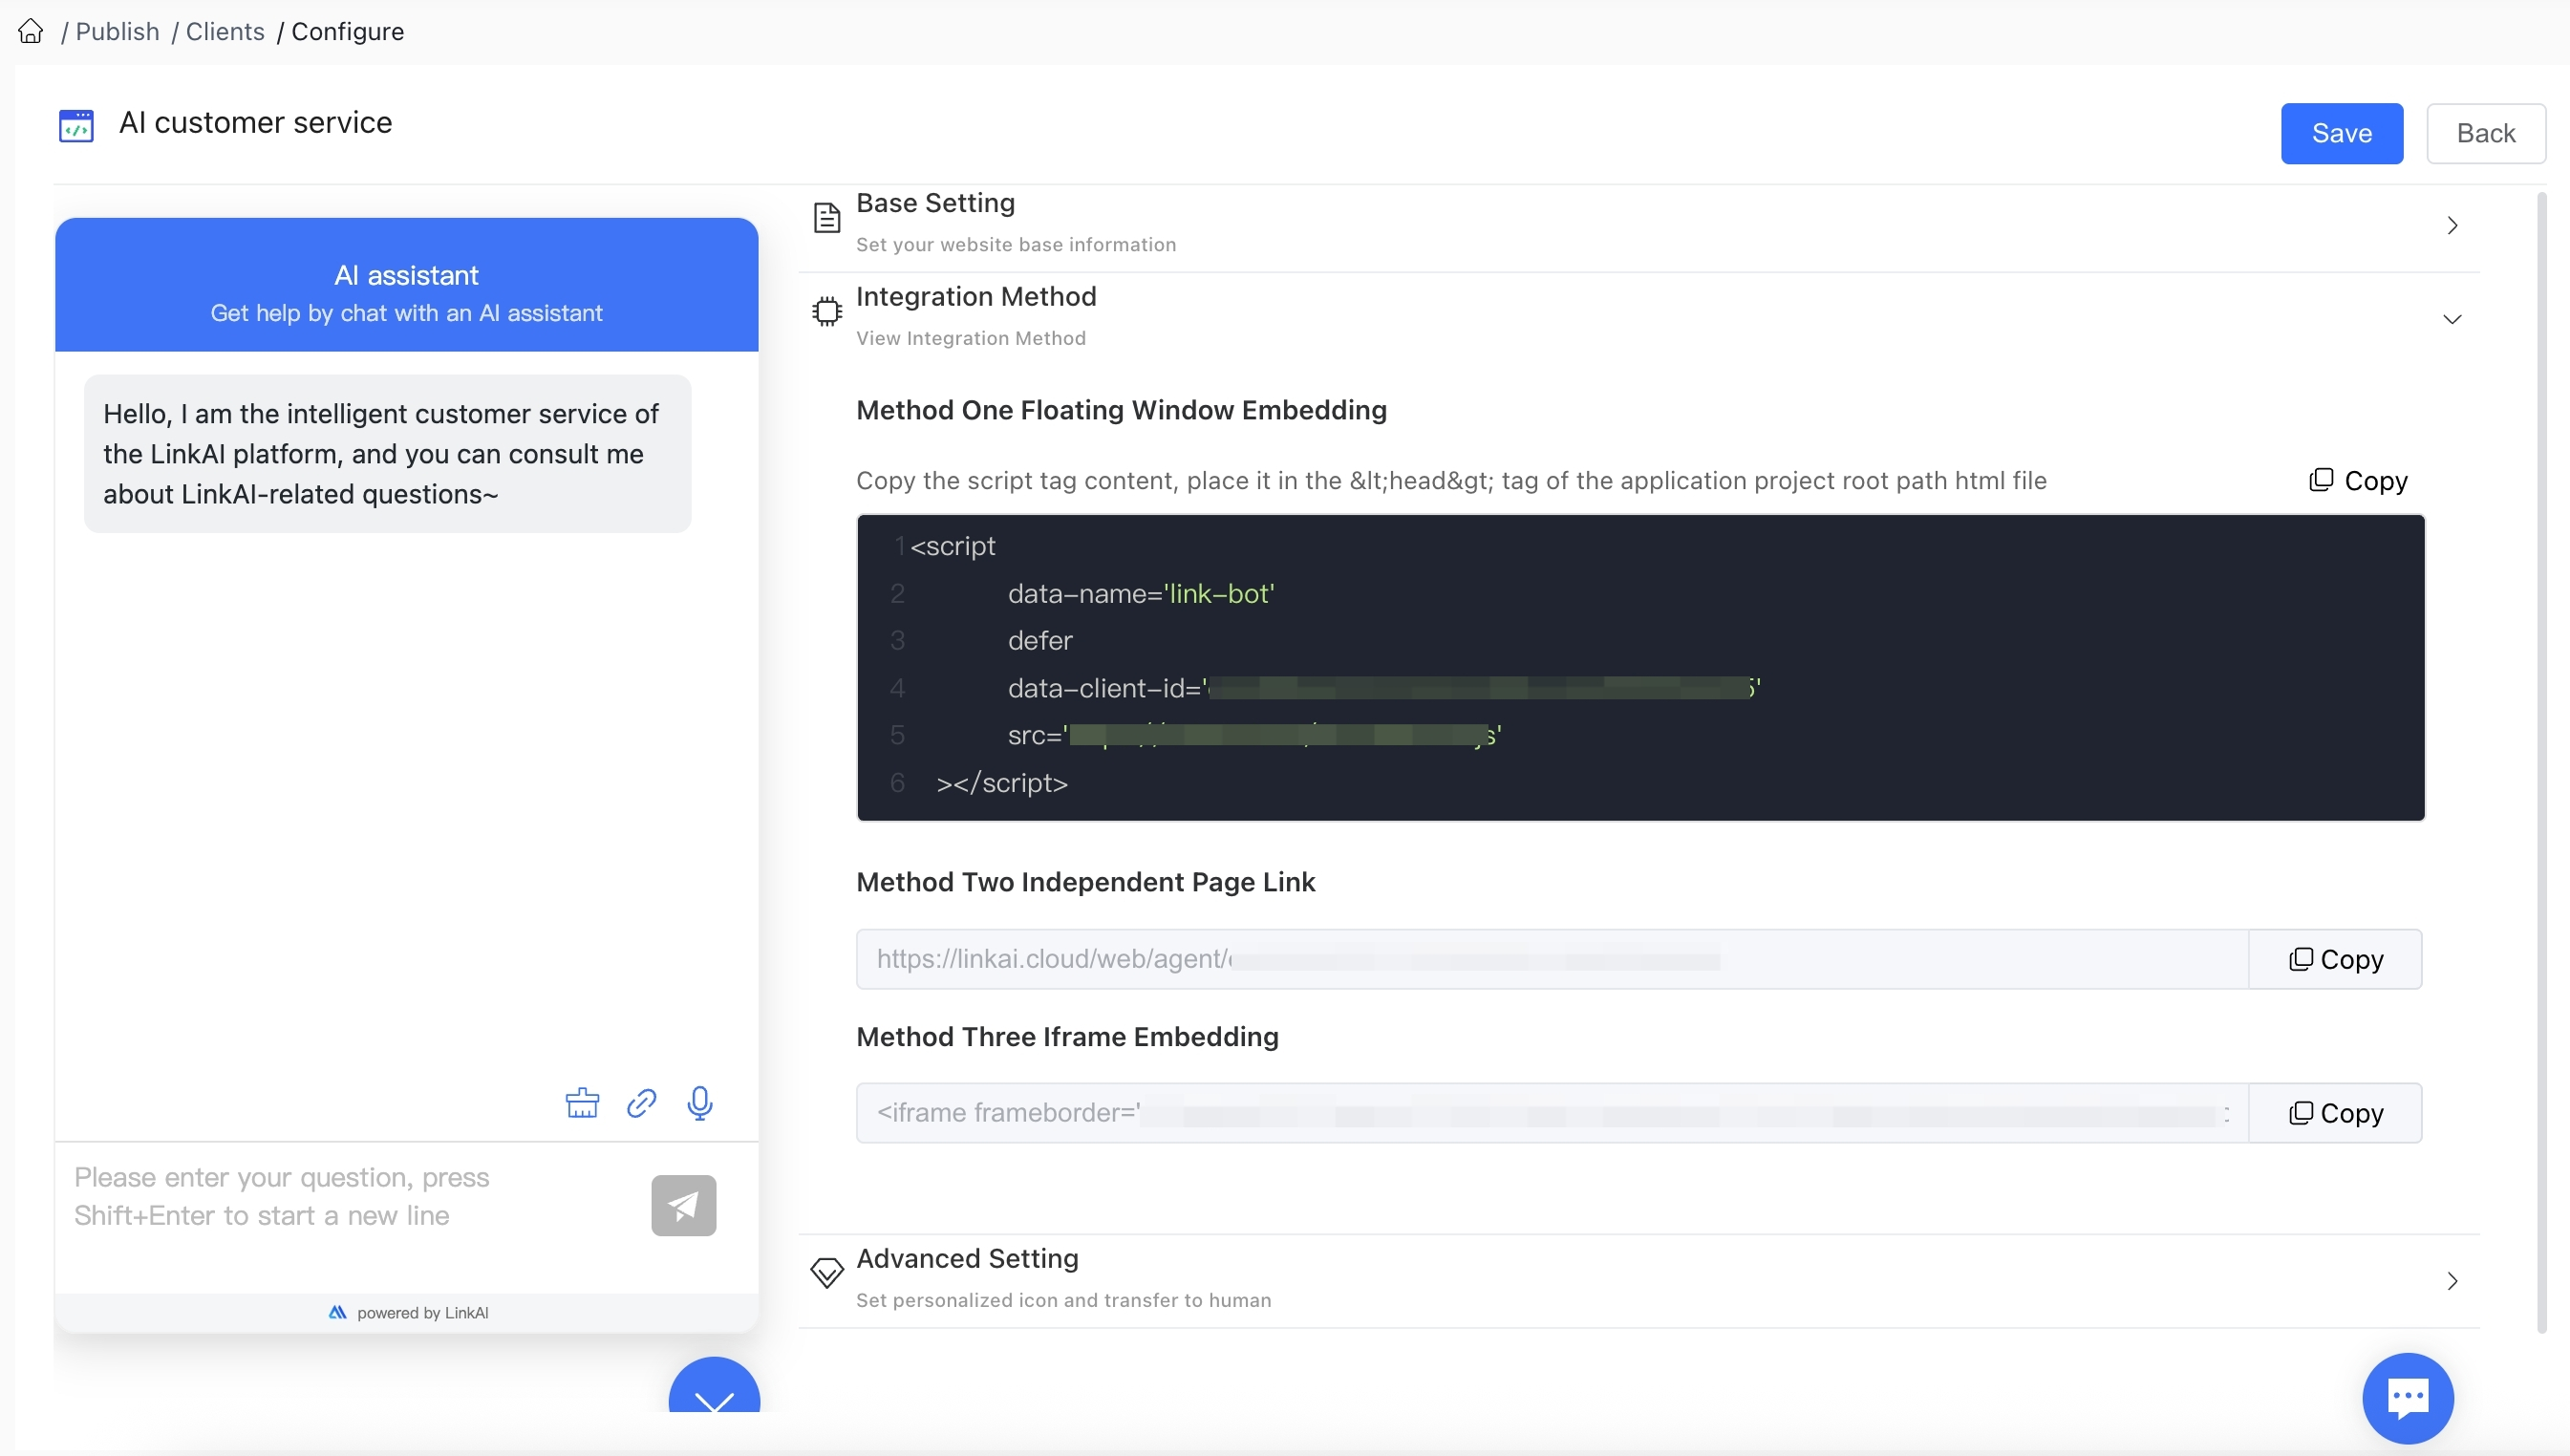
2.1 Floating Chat Window
This method packages the entire Agent conversation capability as a chat window that floats on your website. By adding a few lines of JavaScript code, you can integrate intelligent conversation capabilities into your site with an attractive, flexible interface.
The advantage of this method is that you don't need to design or implement the conversation interface yourself—just integrate our pre-built solution. You can configure which pages should display the floating window and which shouldn't. The window can be expanded/collapsed with a click, supports streaming output, Markdown formatting, and sending images and videos.

2.2 iframe Embedding
If you need to embed the chat window in a specific location on your webpage, choose the iframe embedding method. An iframe is an HTML tag that allows you to embed one webpage within another.
The advantage of this method is that you can embed the Agent chat window anywhere on your page and freely adjust its dimensions.

2.3 Standalone Page Link
If you need to present the Agent chat window as a standalone page, choose the standalone page link method, which provides a directly accessible URL.
This method is highly flexible and convenient—users can access the chat window directly by opening the link, with no login required. The standalone page link can be used directly or to quickly integrate AI conversation capabilities into your website, app, or mini-program. Simply design a feature that opens a new page when clicked and set the target URL to the standalone page link.

3. Advanced Settings
Version requirement: Team
The Team version allows you to customize various icons in the embedded chat window to reflect your brand identity:
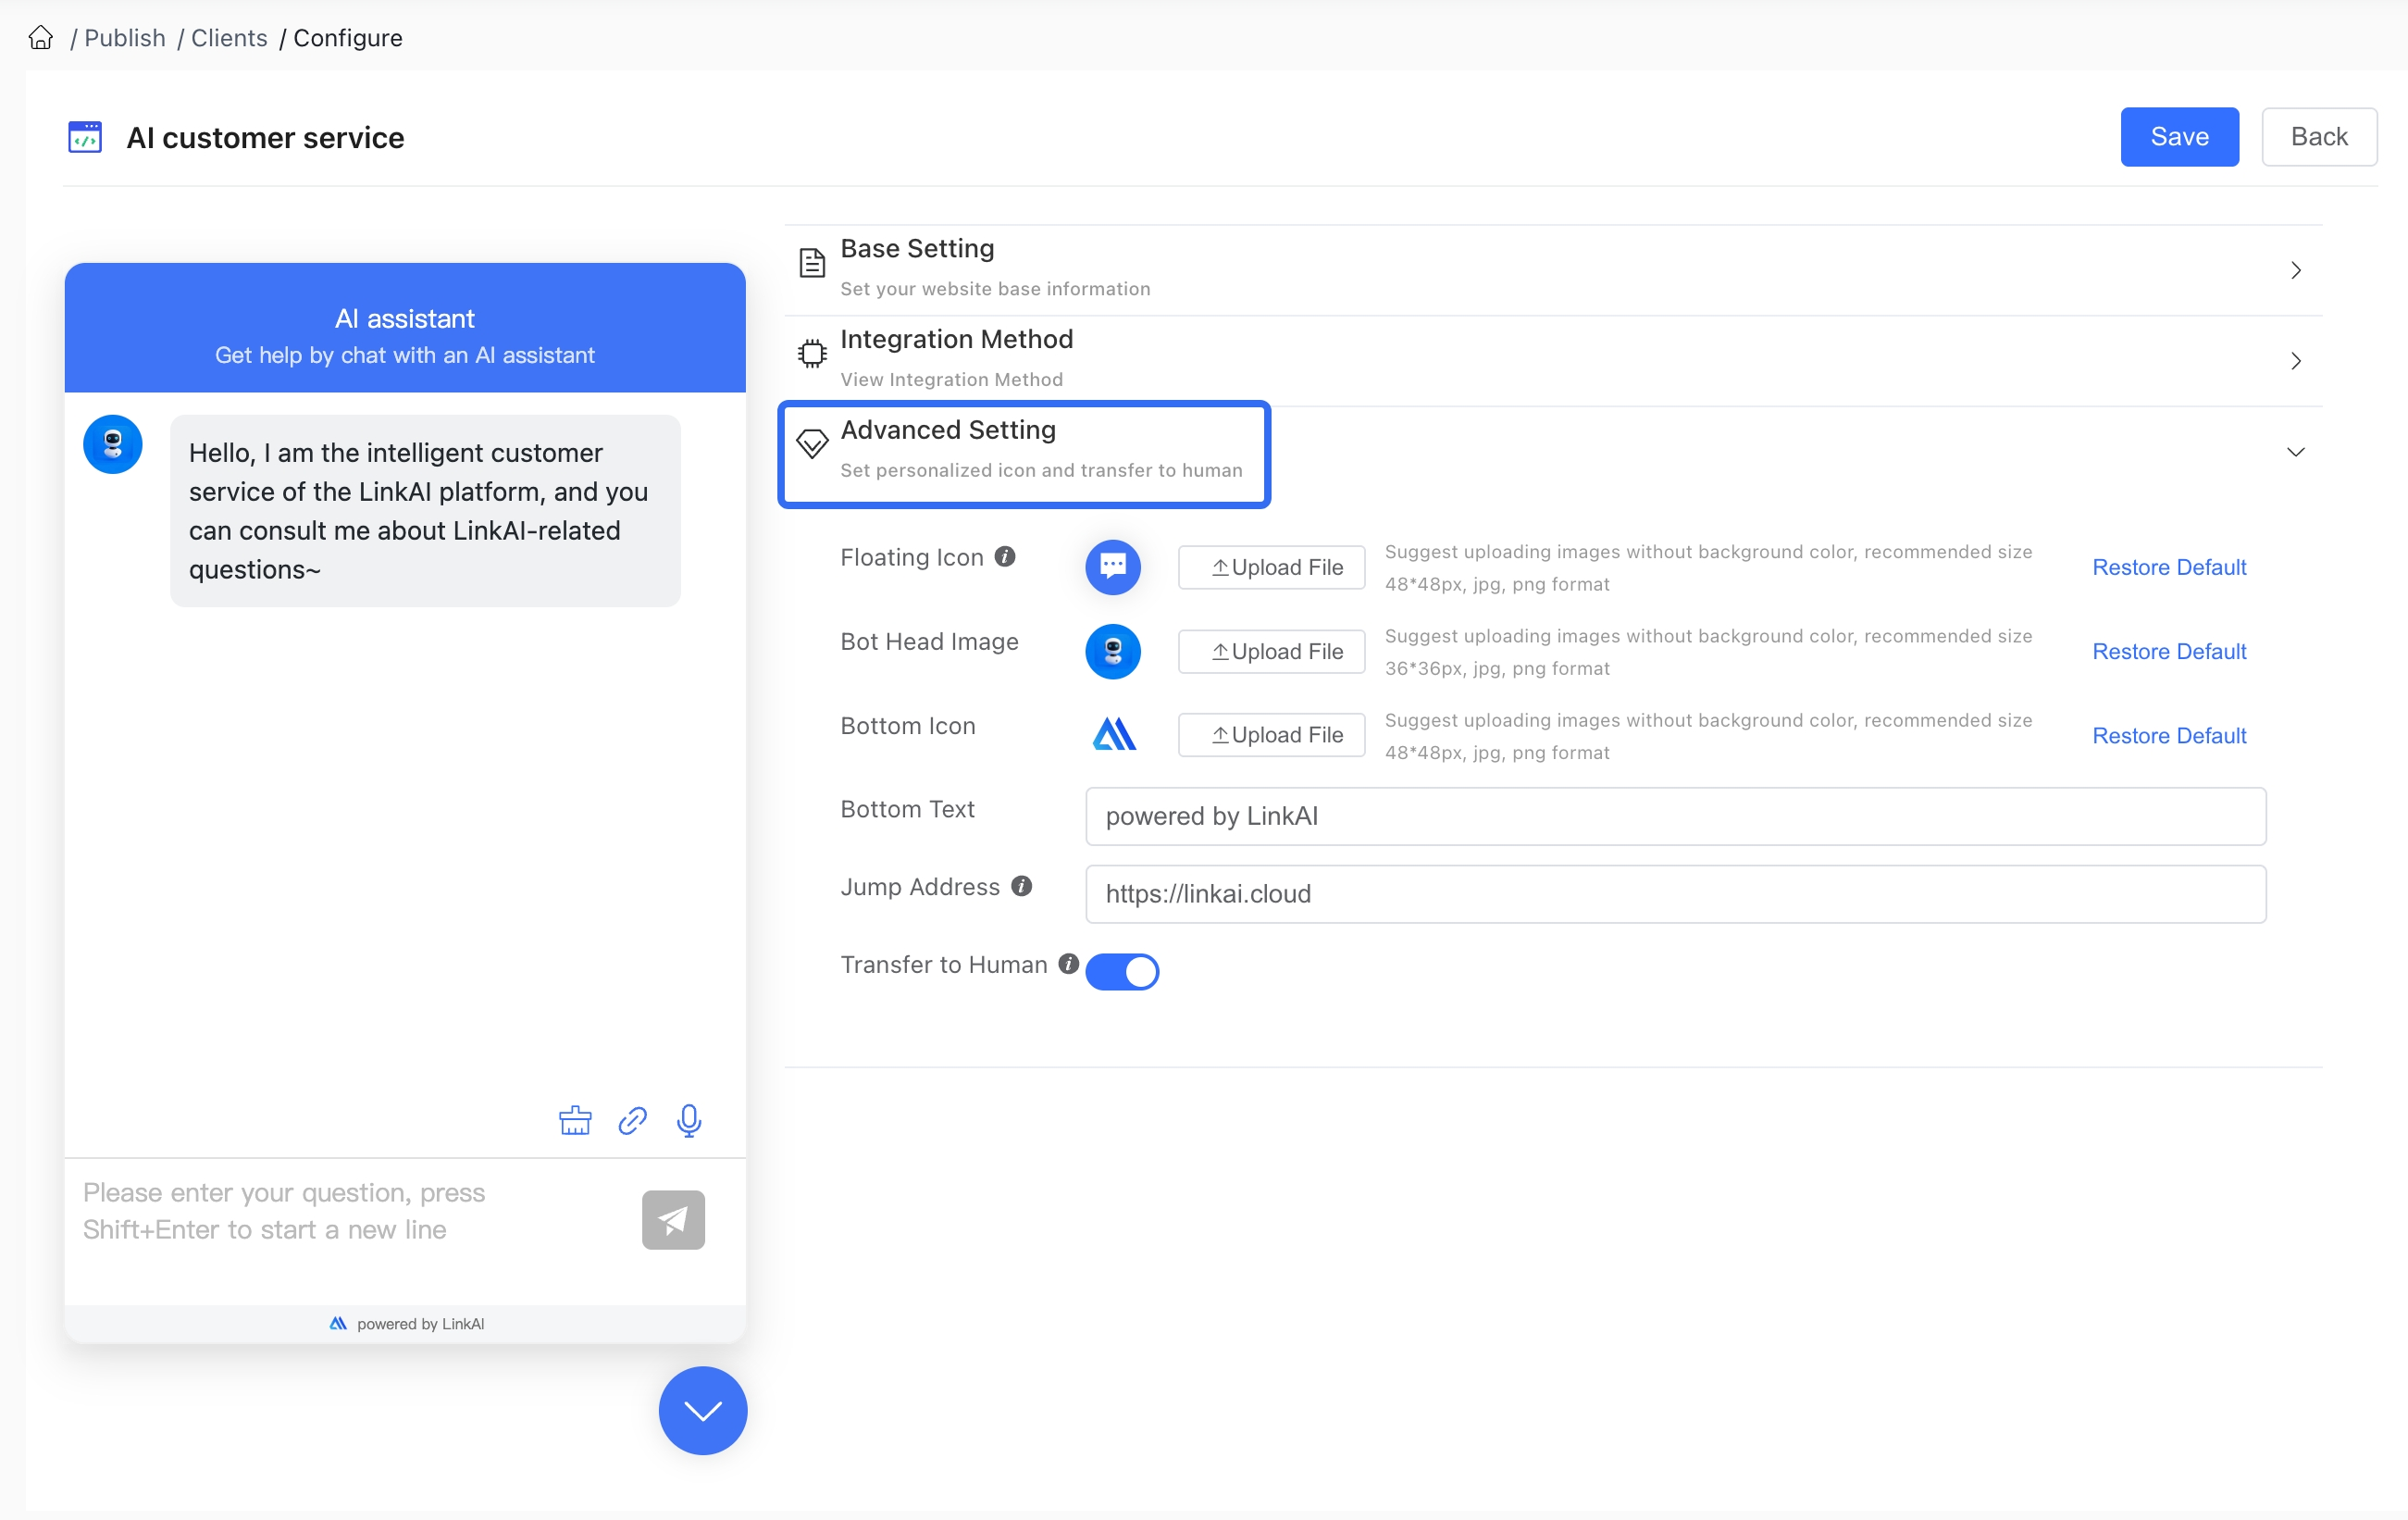
Configuration Options:
Floating Icon: The icon that expands/collapses the chat window when using the floating window integration method
Bot Avatar: The avatar displayed for the AI in the chat window
Bottom Logo and Tagline: The logo and tagline displayed at the bottom of the chat window
Redirect URL: When configured, clicking the bottom logo or tagline will redirect to this third-party URL
Human Support: Enable manual handoff to human support agents. Users can request human assistance, and support staff can receive and respond to messages in real-time through the "Conversation Management" page. For complete human handoff capabilities, see the Human Handoff documentation.
4. Additional Information
4.1 Image Input
Web integrations support image input from users, allowing the AI to analyze images and respond. To enable this feature: In the application settings for your web integration, enable the "Image Recognition" plugin, and the web integration chat window will automatically enable image sending capabilities.

4.2 Rate Limiting
To prevent excessive usage or abuse of your AI service, you can use the rate limiting module to restrict the number of requests users can make. For details, see the Rate Limiting Configuration:

You can configure rate limits by channel and user:
